A saddle-stitched notebook may look simple, but producing it consistently requires more than placing two staples in the fold. Printed sections must arrive in the correct order, sit evenly on the gathering chain, align at the spine, receive properly formed stitches, and retain the intended margins after trimming.
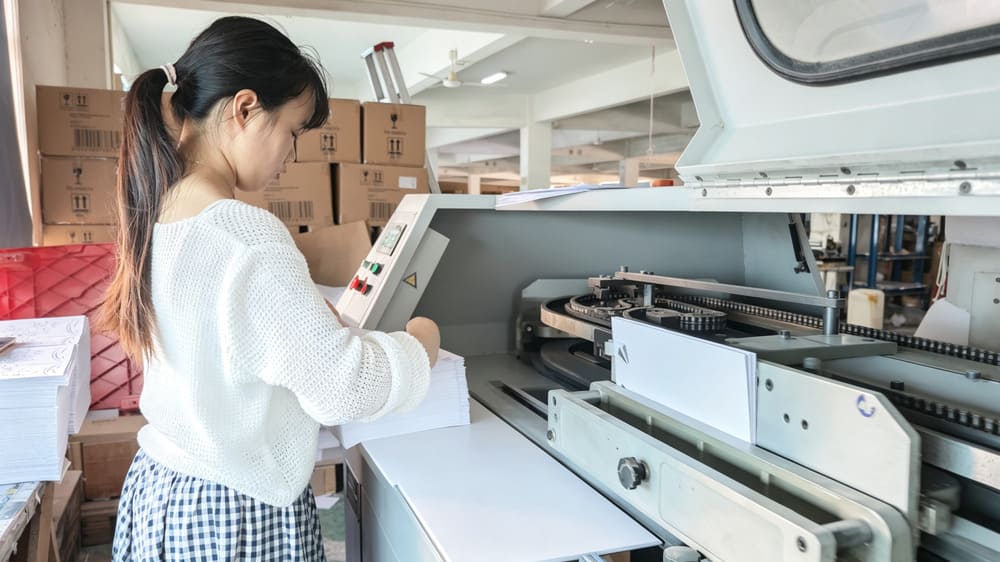
In YIMU’s binding workshop, a trained operator monitors an industrial saddle stitching machine while folded sections move through production. The operator checks the material supply, observes the machine, reviews finished samples, and keeps the output organized for the next step.
The equipment performs the repeated gathering and stitching work. Product quality still depends on artwork preparation, folding, page sequence, paper thickness, machine setup, stitching wire, trimming, and inspection.
What Is Industrial Saddle Stitching?
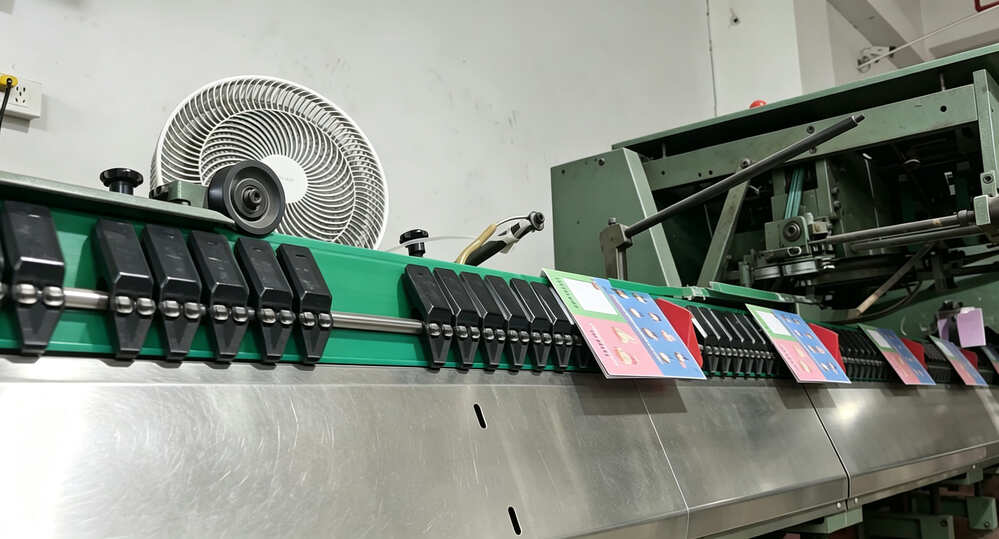
Saddle stitching is a binding method in which folded sheets or signatures are placed over a saddle-shaped support and joined through the center fold with wire stitches. The wire is driven through the nested sections and formed on the inside to hold the pages together.
In an industrial process, the line may carry out several operations:
- feeding folded sections from individual stations;
- gathering the sections in the required sequence;
- detecting certain feeding or thickness errors, if the installed system includes those controls;
- stitching through the fold;
- transporting the stitched product; and
- trimming the head, foot, and fore edge, depending on the line configuration.
This process is commonly used for thinner notebooks, exercise books, brochures, catalogs, manuals, magazines, and booklets. It creates a clean center fold and uses no adhesive at the stitched spine.
The Role of a Saddle Stitcher in Book Production
An industrial saddle stitcher brings gathering, fastening, and sometimes trimming into a coordinated flow. This is useful when a job contains multiple folded sections that need to remain in a precise page sequence.
The line must place every section in the correct position before stitching. A missing or duplicated section can create an incomplete product even when the staples look correct. The stitch itself must pass through the intended fold and form securely without tearing the paper. If trimming is included, the three open edges must then be cut to the required finished size.
The process connects several departments. Printing establishes page content and registration. Folding creates the signatures. Saddle stitching gathers and fastens them. Trimming produces the final dimensions. A difference introduced at one stage may only become visible after the booklet is assembled.
Is Saddle Stitching Suitable for Every Notebook?
No binding method suits every product. Saddle stitching works best when the nested sections and cover can fold together without creating excessive bulk at the spine.
Suitability depends on:
- finished notebook size;
- page count;
- paper weight and thickness;
- cover stock and surface finish;
- number and structure of folded sections;
- expected opening behavior;
- intended use and service life;
- trim margins and artwork near the edges; and
- production quantity and cost target.
As the product becomes thicker, the inner pages extend farther beyond the outer pages. This effect is known as creep or shingling. If it is not allowed for during imposition and trimming, inner-page margins can become visibly narrower or content can move too close to the fore edge.
A physical sample is therefore important when the page count, paper, or cover material approaches the practical limit for the selected construction.
How YIMU Prepares a Saddle Stitching Job
1. Confirming the approved specification
The production team checks the job information before setup. This may include the finished size, flat and folded dimensions, page count, signature sequence, paper, cover, stitch requirement, trim allowance, quantity, and packaging instructions.
The correct interior and cover versions must remain clearly identified. Similar designs, language variants, dated planner editions, and promotional versions should not be treated as interchangeable.
2. Checking folded sections
The folded sections are reviewed before they enter the saddle stitcher. The fold should be in the intended position, page orientation should be correct, and the sections should not contain obvious wrinkles, dog-eared corners, mixed versions, or damaged edges.
Fold consistency matters because the center fold becomes the stitching line. A skewed or displaced fold can affect the stitch position, page alignment, and final trim.
3. Arranging the feeding stations
Each section is assigned to its required position in the gathering sequence. The operator prepares the feeders, guides, chain, stitching section, delivery, and any integrated trimming unit according to the equipment manual and production plan.
If the line includes missing-sheet, double-sheet, thickness, or barcode controls, those systems must be set for the job and verified according to the site procedure. The article does not assume that every YIMU machine has the same detection functions.
4. Running setup copies
The first assembled copies are opened and checked before the full run continues. The operator confirms page order, section orientation, stitch position, stitch formation, fold alignment, cover position, and finished dimensions.
If the sample does not match the approved requirement, the cause is investigated before mass production. The issue may come from feeding, folding, gathering, stitching, trimming, or the relationship between several stages.
5. Monitoring the production run
During production, the operator watches the flow of sections and inspects output at suitable intervals. Waste and rejected pieces are separated from accepted products. Completed notebooks or booklets remain identified by order and version until counting, packing, or the next process is complete.
How the Stitching Process Works
Once the sections are gathered over the saddle, they travel to the stitching heads. Wire is cut and formed into stitches that pass through the center fold. Clincher components form the stitch legs on the inside of the product.
The accepted stitch should match the approved product specification. It needs to sit in the intended position, pass through the nested sections, and form without loose legs, sharp protrusions, excessive indentation, or visible damage to the paper.
The number and placement of stitches depend on the product dimensions, page structure, paper, and job requirements. A larger or unusual format should not automatically use the same arrangement as a small booklet.
Stitching wire condition also matters. Wire that does not feed, cut, or form correctly can lead to incomplete or misshaped stitches. Operators respond to repeated defects rather than allowing questionable copies to continue downstream.
Safe Working Practices Around an Industrial Saddle Stitcher
Industrial saddle stitching lines contain feeding mechanisms, chains, grippers, stitching heads, clinchers, rollers, belts, and cutting knives. These components can create puncture, trapping, crushing, cutting, and entanglement hazards.
General safety principles include:
- allowing only trained and authorized personnel to operate, adjust, clean, or service the machine;
- completing the required pre-start checks;
- confirming that fixed guards, interlocked guards, tunnel guards, and emergency controls are in place and functioning;
- keeping hands, hair, clothing, jewelry, tools, and loose items away from moving machinery;
- using the specified controls for setup and limited movement;
- never bypassing a guard, sensor, interlock, or other protective device;
- stopping the line and following the approved procedure before removing a jammed or incomplete copy;
- isolating hazardous energy before accessing stitching heads, clinchers, knives, drives, or other danger zones for cleaning or maintenance;
- allowing only trained personnel to replace or adjust knives and stitching components; and
- reporting damaged guards, broken wire, repeated misfeeds, abnormal noise, or unexpected movement.
These points provide a general safety overview. They do not replace the exact machine manual, YIMU’s risk assessment, operator training, or local safety requirements. Workshop footage should not be described as a tutorial.
How YIMU Checks Saddle-Stitched Products
Page and signature sequence
A sample is opened and compared with the approved reference. The team checks for missing, repeated, reversed, or incorrectly positioned sections. Page numbering, headers, dated content, and section dividers can provide useful reference points.
Fold and spine alignment
The center fold should follow the intended spine line. The cover and inner sections need to sit consistently around that fold. A skewed section can create uneven margins, poor stitch placement, or an irregular fore edge.
Stitch position
The stitches are checked against the required positions along the spine. They should not drift away from the fold or sit where they interfere with printed content. Placement also needs to remain consistent from copy to copy.
Clinch and stitch formation
The inside legs of each stitch should be formed as required, without dangerous sharp points or loose ends. The team also looks for missing stitches, partial penetration, damaged wire, excessive crushing, torn paper, or marks around the stitching area.
Cover alignment
The front cover, back cover, and spine fold are compared with the book block. Artwork should sit in the intended position after folding and trimming. Score lines, if used, must suit the cover and finished construction.
Finished dimensions and squareness
If the product is trimmed, the head, foot, and fore edge are checked against the finished dimensions. The notebook or booklet should not show unintended skew, uneven edges, or a trim that removes required content.
Creep and trim margins
Inner pages naturally project farther in a nested saddle-stitched product. The team checks whether the imposed artwork and trim have managed this effect appropriately. Page numbers, ruled areas, frames, and text near the fore edge make inconsistent margins easier to see.
Page security and handling
Samples are opened and handled to check whether the stitched sections remain secure under the agreed test conditions. The review looks for loose center leaves, tearing around the wire, pulled stitches, or a cover that separates from the nested sections.
In-process inspection
An approved first copy establishes the initial reference, but production checks continue. Feeder performance, section condition, wire formation, stitch position, and trim can change during a run. Periodic inspection helps identify variation before more copies reach packing.
Trimming Saddle-Stitched Products
Many industrial saddle stitching lines are paired with a three-knife trimmer. The stitched product is cut at the head, foot, and fore edge to produce the finished dimensions and clean open edges.
Trimming must account for the nested structure. Inner leaves extend farther than outer leaves before the fore edge is cut. The artwork and imposition plan should therefore include suitable trim allowances and creep compensation where needed.
The trimming stage is also where several earlier differences become visible. A displaced fold, poorly gathered section, or skewed cover may produce uneven margins after cutting. YIMU checks the assembled and trimmed sample rather than judging the loose printed sheet alone.
Why Saddle Stitching Matters to Notebook Buyers
Saddle stitching can create a light, clean, economical product that opens readily and displays a visible center spread. It is often a practical choice for exercise books, promotional notebooks, event materials, workbooks, manuals, and booklets with a suitable page count.
Buyers should review the finished sample in the way the product will be used. Useful checks include:
- opening the center spread and checking the stitches;
- confirming the first, middle, and final pages;
- comparing inner and outer margins;
- looking for sharp or loose stitch legs;
- checking the cover and spine fold;
- measuring the finished size;
- assessing how the product sits when closed; and
- checking whether the construction suits expected handling.
Frequently Asked Questions
What does an industrial saddle stitching machine do?
It gathers folded sections over a saddle and fastens them through the center fold with formed wire stitches. Depending on the production line, it may also include automated feeding, error detection, transport, and three-side trimming.
Is saddle stitching the same as thread sewing?
No. Saddle stitching normally uses formed wire staples through the center fold of nested sections. Thread sewing uses thread to connect signatures into a book block. The equipment, construction, and suitable product range differ.
How many pages can a saddle-stitched notebook have?
There is no reliable universal page limit. The practical limit depends on paper thickness, cover stock, finished size, fold structure, stitch specification, trim, and the opening and appearance required. A physical sample is more useful than choosing a page count from a general chart.
Why do inner pages have narrower margins after trimming?
Nested inner sheets extend farther from the spine than outer sheets. This is called creep. The imposition and trim plan can compensate for it, but the result must be checked using the actual paper and page count.
What saddle-stitching defects should be checked?
Common checks include missing or repeated sections, incorrect page order, stitches away from the fold, missing stitches, loose or sharp stitch legs, torn paper, skewed covers, uneven trimming, and content too close to the trimmed edge.
Does saddle stitching use glue?
The center binding itself normally relies on wire stitches rather than spine adhesive. Other product components or finishes may still use adhesive, depending on the design.
Is this article an operating guide for a saddle stitcher?
No. Industrial saddle stitchers contain wire-forming heads, clinchers, chains, grippers, and cutting equipment. Only trained and authorized personnel should operate or service them according to the exact machine manual and workplace procedures.
Plan a Saddle-Stitched Product with YIMU
Share your finished size, page count, paper, cover material, artwork, quantity, packaging needs, and target market. YIMU can review whether saddle stitching suits the project and how the printing, folding, gathering, stitching, and trimming stages should work together.