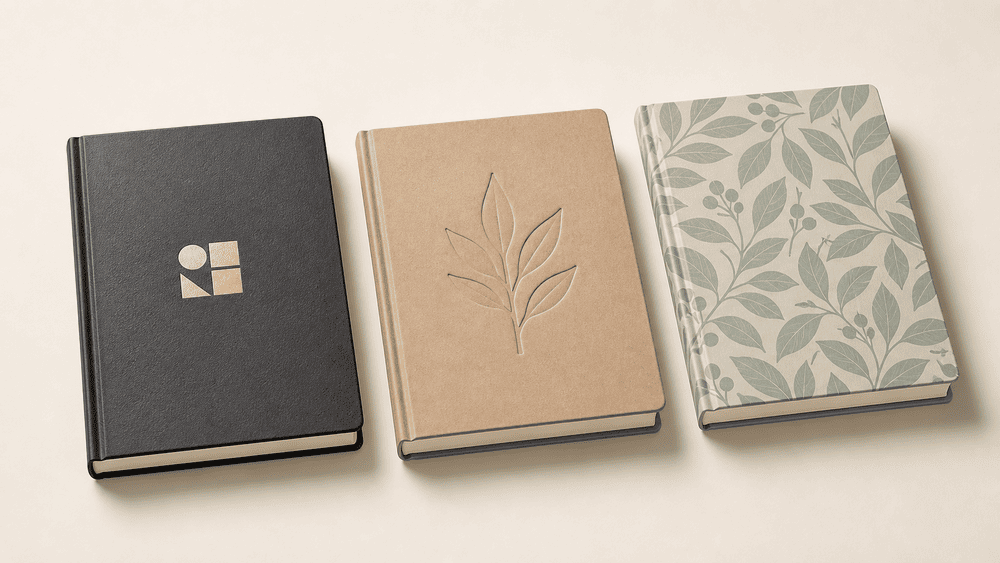
A notebook cover attracts attention, but the inner pages determine how useful the product becomes. A meeting notebook needs room for actions and decisions. A retail journal needs comfortable writing space. A planner needs a page sequence that supports an entire week, month, or year.
To customize notebook inner pages, start with the intended use, choose a layout, confirm the page count and paper, adapt the design to the binding, prepare print-ready artwork, and approve a physical sample.
For brands and wholesale buyers, the aim is not to fill every page with graphics. It is to create an interior that customers can use easily and that a manufacturer can reproduce consistently across a bulk order.
1. Define What the Notebook Should Help People Do
Before selecting paper or drawing a grid, write a simple product brief: who will use the notebook, where they will use it, and what they need to record.
A few examples:
- Retail journal: Flexible writing space, discreet branding, and a paper feel that matches the product’s price positioning.
- Corporate meeting notebook: Fields for the date, attendees, notes, action owners, and deadlines.
- School notebook: Clearly defined ruling, subject information, and enough space for the intended handwriting size.
- Guided journal: Prompts, repeatable exercises, progress reviews, and open writing areas.
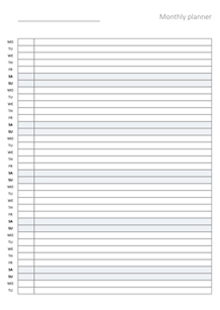
- Planner: Daily, weekly, or monthly layouts with a deliberate sequence and sufficient room for appointments and tasks.
Decide whether customers should follow a fixed system or use the notebook freely. Adding more prompts and boxes can improve structure, but it also reduces the space available for writing.
2. Choose a Custom Notebook Page Layout
Custom notebook inner pages can use a repeating layout, several sections, or different content on every page.
| Layout | Suitable Uses | Details to Specify |
|---|---|---|
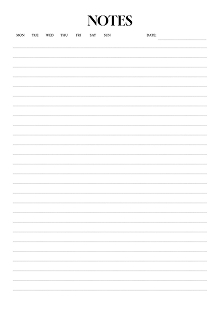
| Lined or ruled | General writing, schoolwork, meeting notes | Line spacing, line weight, ink color, margins, header |
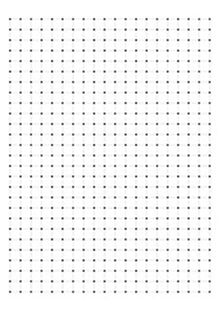
| Dotted | Flexible planning, journaling, layout work | Dot spacing, dot size, contrast, edge margins |
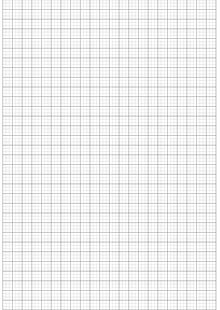
| Grid or squared | Calculations, diagrams, structured notes | Grid spacing, line weight, major divisions |
| Blank | Free-form notes, brainstorming, drawing | Paper suitability, optional page numbers or small logo |
| Planner | Scheduling, task management, goal tracking | Dated or undated format, week start, sections, writing space |
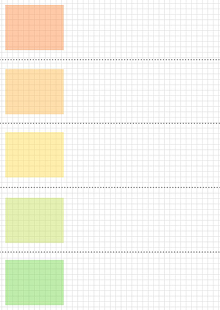
| Guided or branded | Workbooks, training, journals, brand programs | Prompts, instructions, response areas, custom content |
| Mixed sections | Multi-purpose notebooks and branded collections | Page allocation, section order, navigation, transitions |
Make Lines and Dots Support the Writing
Ruling should be visible without competing with handwriting. A layout that looks subtle on a bright screen may print too faintly, while a dark grid may overwhelm the page.
As design trials, you might compare 7 mm and 8 mm ruled spacing, or test a 5 mm dot grid. These are starting points, not universal specifications. Print layouts at actual size and ask representative users to write on them before choosing.
Specify the ruling color and line or dot weight in the artwork. Descriptions such as “light gray lines” are not precise enough for final approval.
Decide Between Repeating and Unique Pages
A repeating lined interior is relatively straightforward to prepare. A notebook with dated pages, numbered exercises, or changing illustrations needs a complete page sequence and more editorial checking.
If only a few page types repeat, provide both the individual layouts and a clear instruction showing how many times each should appear. Confirm with the manufacturer whether the final production file should contain every page in sequence.
3. Build a Page Plan Before Designing the Whole Interior
Page planning prevents missing content, unnecessary blanks, and confusion during quotation.
One leaf of paper has two sides, or two pages. A notebook with 80 interior leaves has 160 interior pages when both sides are counted. Because buyers and suppliers sometimes use “sheets” differently, state both figures and clarify whether covers, endpapers, and inserts are included.
Here is an illustrative plan for a 160-page branded notebook, excluding covers and endpapers:
| Section | Interior Page Positions | Page Count |
|---|---|---|
| Ownership and introduction | 1–2 | 2 |
| Index | 3–4 | 2 |
| Planning section | 5–16 | 12 |
| Ruled writing section | 17–152 | 136 |
| Blank notes | 153–160 | 8 |
| Total | 160 |
This example is a planning aid, not a YIMU standard product or customer case.
Confirm the final page count with the factory before completing the layout. Folded and sewn constructions can require specific page groupings, while punched loose-leaf constructions follow different constraints. Do not assume every binding accepts any page count, or that every notebook must follow the same multiple-of-four rule.
For dated planners, also confirm the year, week-start day, date format, and any country-specific holiday content.
4. Design Around the Finished Size and Binding
The usable writing area is smaller than the finished page. Trimming, binding, page turning, and the user’s hand all require space.
Start at the Final Page Size
Set up the document at its intended dimensions rather than designing a large page and shrinking it later. For example, an A5 trimmed interior page measures 148 × 210 mm. A cover may be larger depending on the construction, so specify interior and cover dimensions separately.
Check text, ruling, and response boxes at 100% scale. A planner spread that looks spacious on a monitor may feel cramped when printed.
Allow Room for the Binding
- Spiral and Wire-O: Keep writing fields and important artwork clear of the punched area. Request the hole position and an appropriate binding-side margin.
- Perfect bound: Allow enough inner margin for comfortable writing near the spine. Do not assume a glue-bound notebook will open completely flat.
- Sewn or case-bound: Confirm the actual opening behavior with a bound sample. Paper, thickness, and construction all affect accessibility near the spine.
For facing pages, use mirrored margins so the binding-side allowance switches correctly between left and right pages.
Avoid placing essential content across the center of a spread unless the sample proves it remains readable and usable. Ask YIMU to confirm the production template and safe areas before artwork is finalized.
5. Choose Paper for the Intended Writing Experience
Paper affects thickness, weight, cost, appearance, and how ink behaves. It should be selected alongside the layout, not after the design is complete.
Specify:
- Paper type and supplier grade, where agreed
- Grammage, expressed in GSM
- White, natural white, ivory, or another paper color
- Surface feel and finish
- Opacity and acceptable show-through
- Intended writing tools
Uncoated writing paper is a useful starting point for many notebooks. Paper intended primarily to reproduce photographs or illustrations may not deliver the writing feel your customer expects.
Higher GSM Does Not Automatically Mean Better Writing Performance
GSM measures mass per area, not ink resistance. Two papers with the same GSM can behave differently because of their composition, surface treatment, and manufacturing characteristics.
Test samples with the pens your customers will use. Check for:
- Feathering: Ink spreading along the paper fibers.
- Bleed-through: Ink penetrating to the other side.
- Show-through: Writing remaining visible through the paper without necessarily penetrating it.
- Smudging: Ink transferring before it dries.
If fountain-pen performance is a selling point, test the proposed stock with representative pens and inks before making that claim.
Heavier paper can also increase the notebook’s thickness and shipping weight. Changing the paper may require adjustments to the binding, spine, cover, or packaging, even when the page count stays the same.
6. Select Printing Colors and Add Branding Carefully
Interior printing can range from simple single-color ruling to full-color illustrations and custom worksheets.
For a writing-focused notebook, consider placing stronger branding on the opening pages and using restrained logos, headers, or footers throughout the writing section. Large watermarks and dark backgrounds can make handwriting harder to read.
Possible branding elements include:
- An ownership page
- A short brand introduction
- A logo in the header or footer
- Branded section dividers
- Page numbers and an index
- A website or QR code
- Custom prompts connected to the product’s purpose
Ask the printer how the proposed colors will be produced. A colored line might use a separate spot ink or a CMYK process build, depending on the production plan. Do not assume that one extra color, or just a few color pages, will add only a small fixed amount to the price.
Review ink density on the actual paper. Very pale dots and fine rules need particular attention in the printed sample. Test QR codes from the physical proof and verify their destination before approval.
7. Prepare Print-Ready Interior Artwork
The safest starting point is the manufacturer’s confirmed artwork specification. Agree on the trimmed size, bleed, safe areas, color setup, and PDF export requirements before sending final files.
File-Preparation Checklist
- Build the layout at its final size.
- Keep editable source files, but supply the requested production PDF.
- Export pages in reading order unless the printer asks for another arrangement.
- Do not manually rearrange pages into printing-sheet order without instructions.
- Include intended blank pages and identify their purpose.
- Embed fonts where licensing permits; resolve missing fonts and overset text.
- Keep lines, dots, and text as vector elements where possible.
- Check effective image resolution at the final placed size; 300 ppi is a common starting point for photographic images, subject to the printer’s requirements.
- Confirm the required CMYK profile or spot-color setup rather than converting colors blindly.
- Add bleed where artwork reaches the trimmed edge, using the printer’s specified amount.
- Add printer’s marks only as requested.
Bleed extends edge-to-edge artwork beyond the cut line; it does not replace the safe margin that protects important content. Adobe’s print-ready PDF guidance explains the importance of checking fonts, linked images, resolution, color, bleed, and preflight errors before export.
Use one clearly named final file, such as Brand-A5-Interior-v03-Approved.pdf. Keep a revision record so an earlier layout cannot be mistaken for the approved version.
8. Approve the Interior in a Bound Sample
A digital proof is useful for checking text and page order. It cannot fully establish writing feel, opacity, opening behavior, or printed ruling visibility.
Review the custom notebook inner pages in a physical sample and confirm:
- Trimmed size and total page count
- Paper type, color, and agreed GSM
- Line, dot, or grid spacing
- Printed contrast and legibility
- Correct content and page sequence
- Left/right page orientation and mirrored margins
- Dates, page numbers, spelling, and language versions
- Writing space near the binding
- Paper performance with intended pens
- Page turning and binding function
If the sample uses a different printing method or substitute material, ask which characteristics it can reliably demonstrate and what remains to be approved.
Test the sample as an actual user: complete a meeting spread, plan a week, or write several pages. This often reveals problems that a visual inspection misses, such as action boxes that are too narrow or writing lines positioned too close to the spine.
Use the custom notebook sample checklist to record approval and keep the final artwork version tied to the approved specification.
How to Control the Cost of Custom Notebook Interior Printing
The cost depends on more than the number of pages. Paper choice, printing colors, page variation, binding, finishing, order quantity, and the number of interior versions all matter.
To simplify a first collection:
- Use the same interior across several cover designs.
- Keep one finished size and paper specification where practical.
- Limit unique page types to those that improve the product.
- Confirm content before sampling to reduce revision rounds.
- Ask for a comparison between simpler printing and the proposed color version.
- Avoid inserts, tabs, or perforation unless they serve a clear purpose and the production method has been confirmed.
For example, three cover artworks using one shared ruled interior can be easier to coordinate than three notebooks with completely different planners inside. The actual MOQ per design still needs confirmation; sharing an interior does not automatically combine every SKU into one minimum.
For more context, read what determines custom notebook MOQ.
A Specification Checklist for Your Inquiry
Send the following information when requesting custom printed notebook pages:
| Requirement | What to Provide |
|---|---|
| Intended use | Retail journal, school notebook, planner, training workbook, or another use |
| Finished interior size | Width × height, in millimeters or inches |
| Binding | Preferred structure, or the opening behavior you need |
| Page count | Total interior pages and leaves; clarify exclusions |
| Page layout | Lined, dotted, grid, blank, planner, guided, or mixed |
| Ruling specification | Spacing, line or dot weight, and ink color |
| Section plan | Order and page allocation for each section |
| Paper | Type, GSM, color, and intended writing tools |
| Printing | Single-color, spot colors, CMYK, or a request for recommendations |
| Branding | Logo, opening pages, footer, page numbers, QR code |
| Artwork | PDF, editable source files if requested, or a reference brief |
| Quantity | Total order and quantity per cover and interior version |
| Schedule | Sample deadline, desired shipment date, destination |
If some details are undecided, provide a sample notebook, reference pages, target market, and budget direction. It is better to identify open questions early than to approve a quotation built on different assumptions.
Custom Notebook Inner Pages with YIMU
YIMU supports lined, blank, dotted, grid, planner-style, and custom-printed interiors for notebook projects. Brands can review page layouts alongside the size, paper, cover, binding, finishes, and packaging to develop a complete product specification.
The standard custom order MOQ starts from 3,000 pieces, subject to product requirements and design allocation. Samples typically take 3–7 days after the artwork and specifications are confirmed. Bulk production typically takes 20–30 days after sample approval and order confirmation. These are production estimates, not delivery-to-destination guarantees; materials, complexity, revisions, and order quantity can affect the schedule.
Explore our custom notebooks and notebook customization capabilities to plan the complete product around your interior design.
Frequently Asked Questions
Can I customize the inside pages, not just the cover?
Yes. YIMU supports custom inner-page layouts, including ruling, dots, grids, planners, branded content, and other artwork. Paper, dimensions, page count, and binding must be confirmed together.
Can one notebook combine lined, dotted, and blank pages?
Yes, subject to the agreed construction and production plan. Provide the number and order of pages in each section, and check the sequence in the proof and sample.
Do I need to design every page individually?
Not necessarily. A repeating interior can begin with a small set of master layouts and a page plan. Confirm who will assemble the complete production PDF, and approve that file before printing. Dated planners and unique content need more detailed page-by-page review.
What paper GSM should I choose?
There is no single correct GSM for every notebook. Choose it alongside writing performance, opacity, thickness, binding, price positioning, and shipping weight. Compare physical paper samples instead of treating GSM as a guarantee of quality.
Can I use my own planner, journal, or worksheet content?
Yes. Provide the content and artwork you are authorized to use, together with the section plan. Your team should approve proofreading, dates, page numbering, and the final file version before production.
Can several cover designs share one interior?
Yes, this is a useful option for coordinated retail collections. Confirm the quantity per design, common specifications, and any SKU-specific changes during quotation.
Create Pages Your Customers Will Actually Use
Successful notebook interiors start with a clear purpose and end with a tested sample. Choose the layout around the user’s task, select paper by writing performance, protect the writing area around the binding, and make every production detail explicit.
Send YIMU your preferred page layout, size, paper requirements, quantity, and sample deadline. Our team can review the interior as part of your full custom notebook project.